Layouts is a tool for creating and customizing headers, footers, and other parts of your website. In this article, we’ll cover the details on how to use Layouts.
Which Layout Is Enabled Right Now
Go to Appearance -> Customize -> Header (or Footer, depending on which one you want to edit) and in the Header style option you can see which header Layout is active right now.

You can also set a specific Layout for an individual page. Go to Pages -> All Pages, select the page you want to customize, and in the Theme Options section choose the necessary Header or Footer style.

Where to Edit Layouts?
In order to edit and customize Layouts, go to Layouts -> All Layouts in the WordPress dashboard. Each theme includes a different pre-built set of Layouts.
Open any of them, and click Edit in Elementor.

Layout Shortcodes
Layouts include a collection of specific shortcodes that can help you build headers and footers faster. You can find them in the ThemeREX Addons Layouts panel.
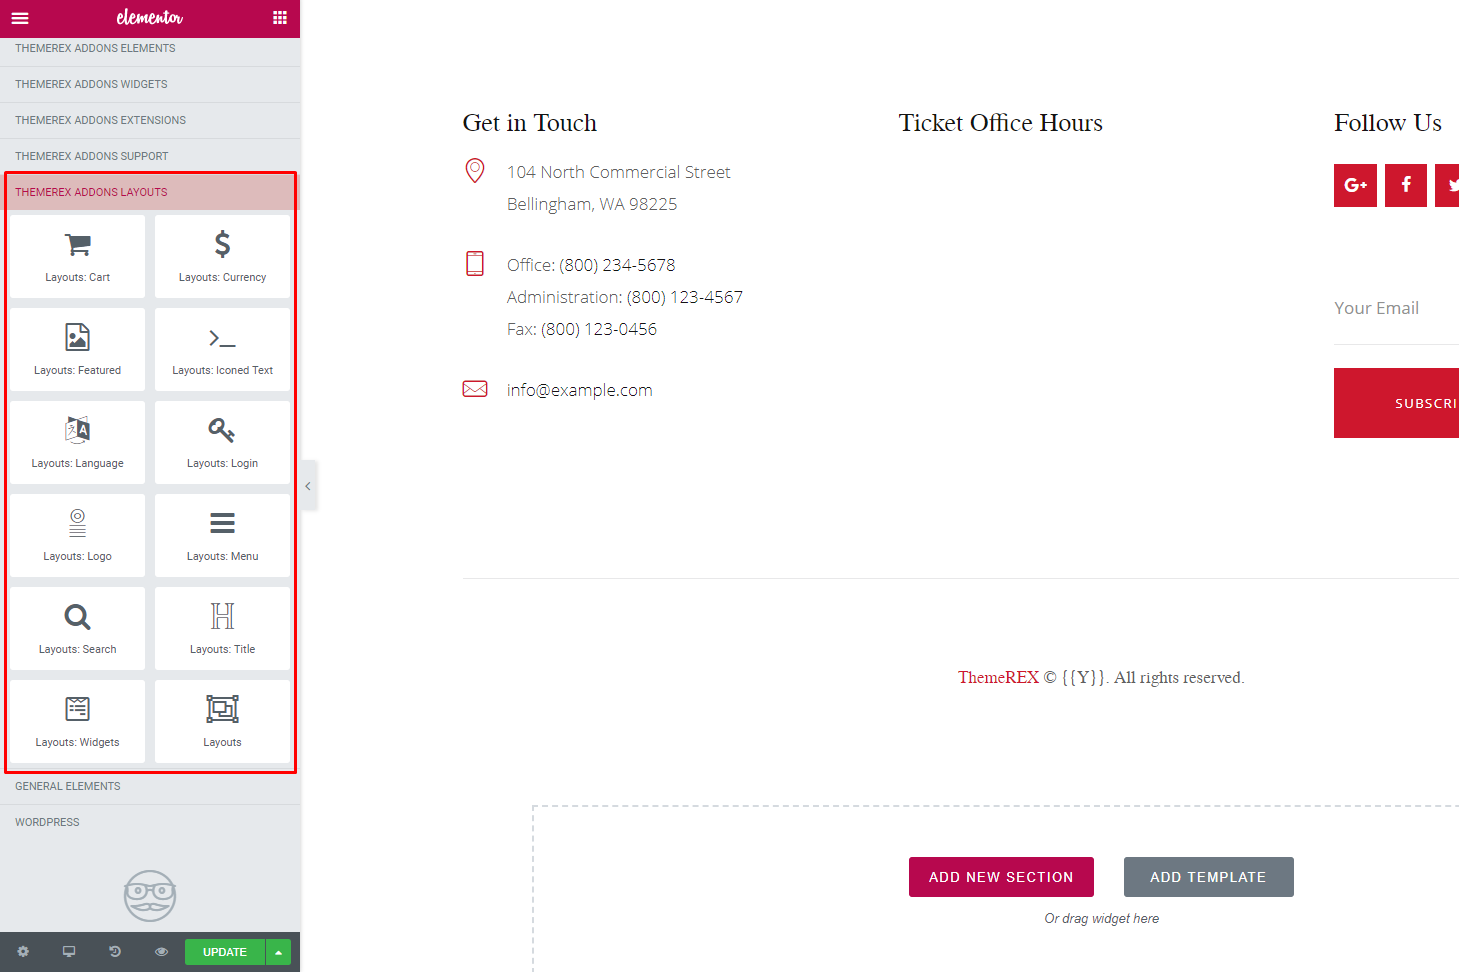
They include the following elements:
- Menu
- Shopping Cart
- Currency
- Logo
- Iconed Text
- Search
- Featured Image
- Login
- Language Switcher
- Title
- Widgets
Please note: Some of the elements, such as Language Switcher, Currency and Shopping Cart, require additional plugins to work as intended.
Additional Layout Settings
Layouts include additional settings that are applied to the whole Layout row.
In order to access them, click on the Section settings in Elementor, and open the Custom Layout panel.
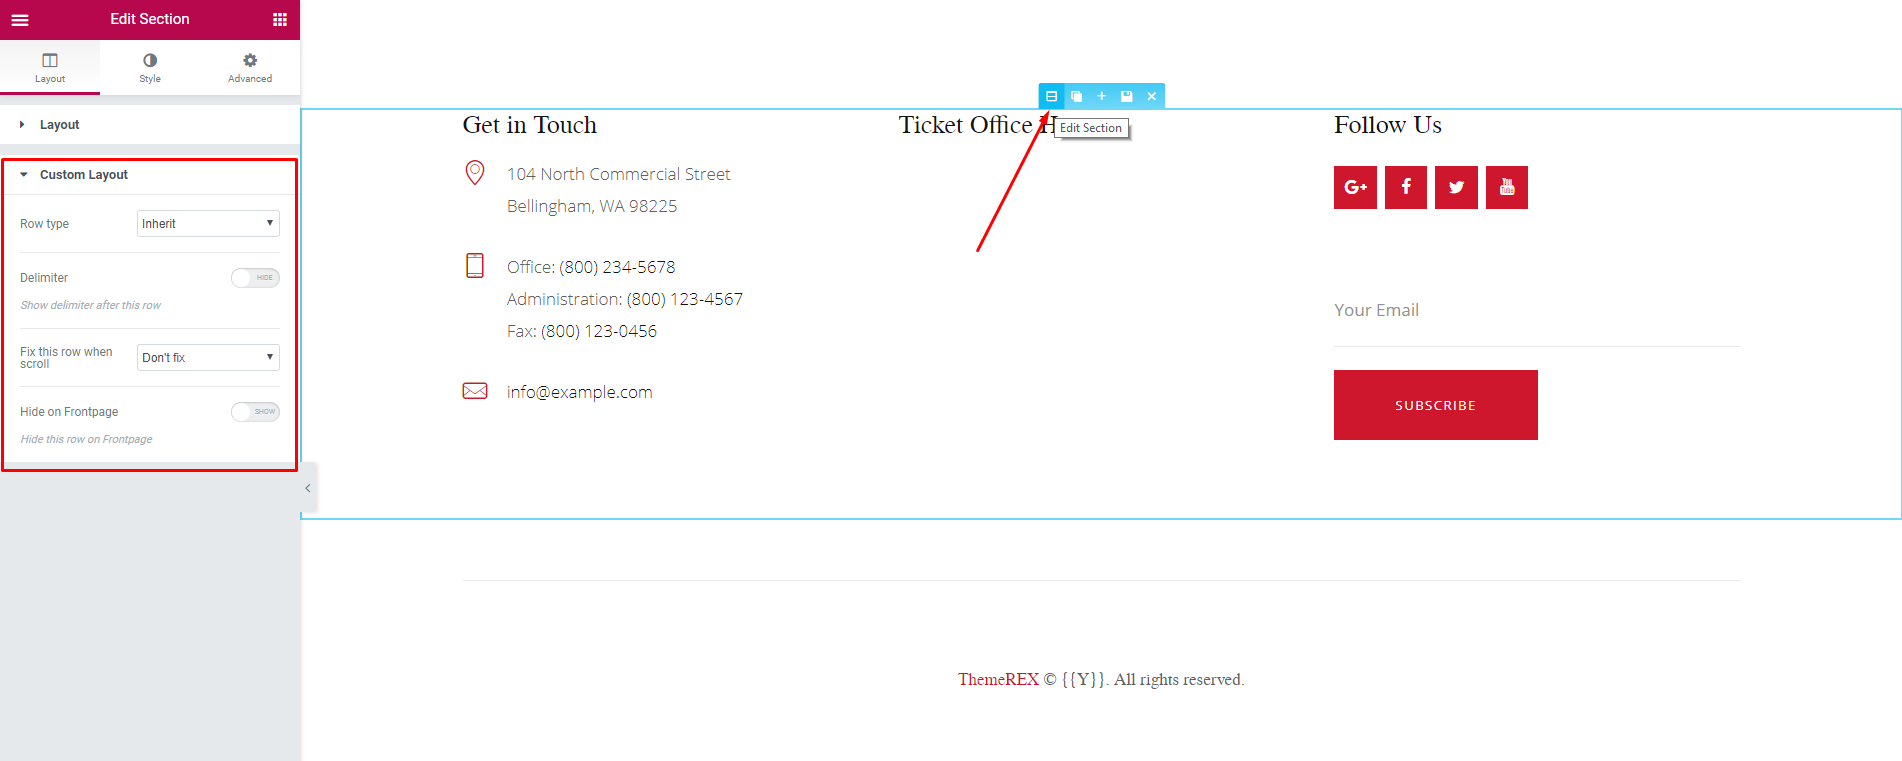
The additional settings allow you to set up the row type, enable delimiter, make the row sticky by fixing it on scroll, and hide the row on front page.